5 Basic Bike Repairs Every Cyclist Should Know How to Do
:max_bytes(150000):strip_icc()/AdamMeyercolour-6957287fb2a6496497af1d0533f89384.jpg)
Adam is a health writer, certified holistic nutritionist, and plant-based athlete. He has published with outlets such as Livestrong, Verywell Fit, Everyday Health, The Beet, The Healthy, and others. Adam lives with his wife and two kids in Nelson, British Columbia, Canada where you can usually find him running trails, working out in his home gym, or writing in a coffee shop.
:max_bytes(150000):strip_icc()/Mikael-Hanson-AGcrop-a8cf77978ffe46a3abd3ae6d58127883.jpg)
Mikael Hanson is a USA cycling and USA triathlon certified coach with over 25 years of coaching experience. He has worked with athletes of all ages, from beginners to World Champions.
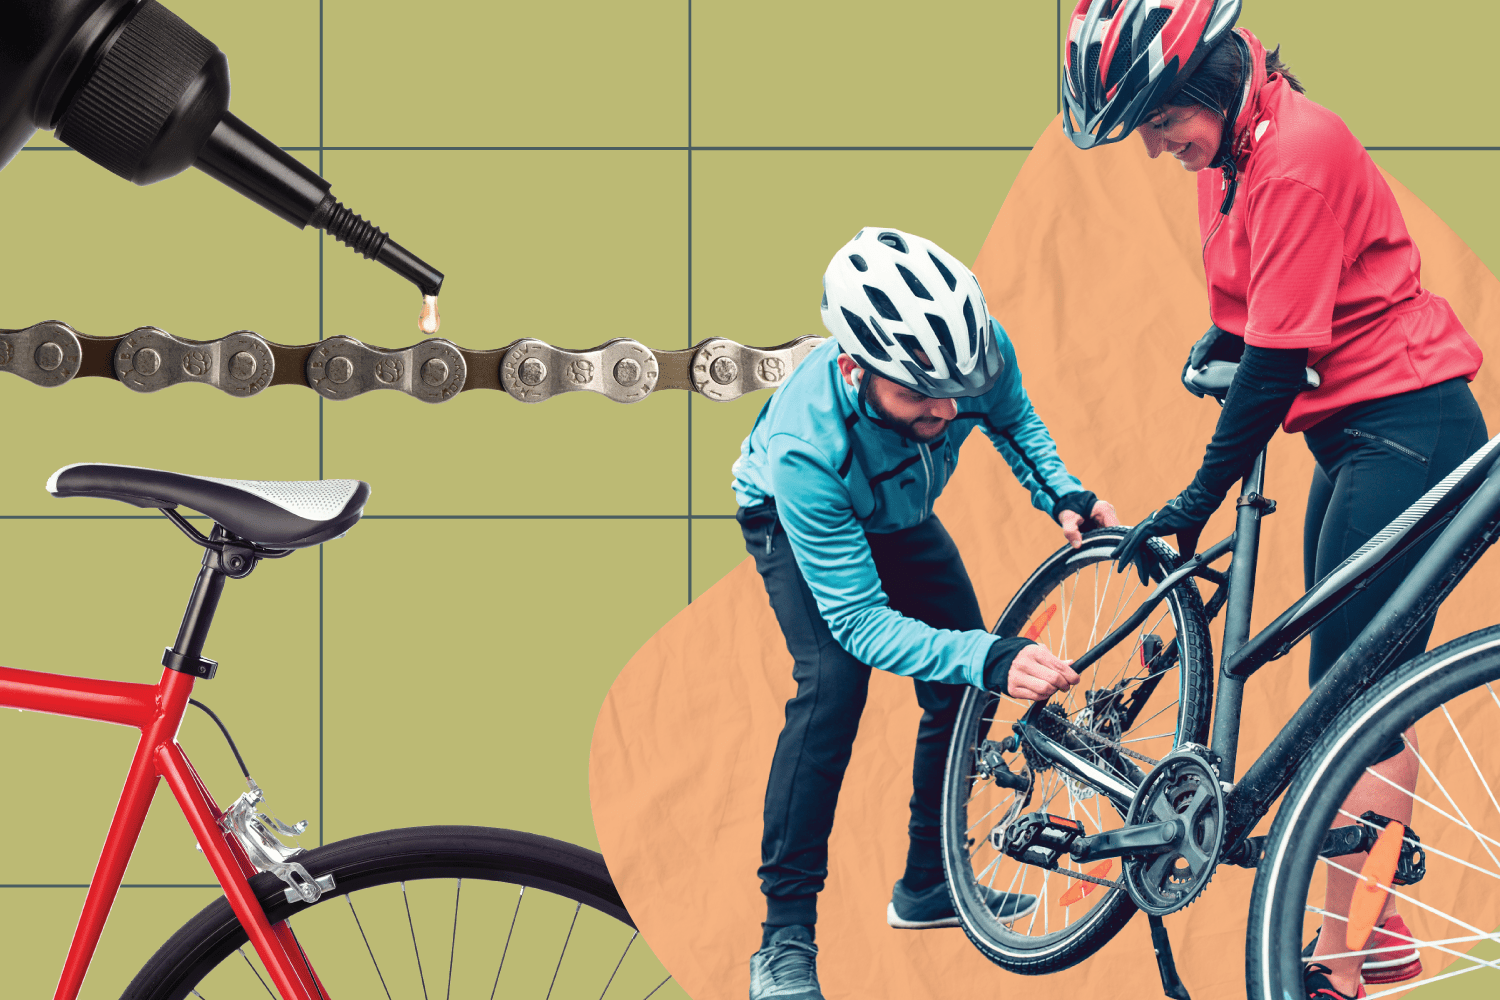
Verywell / Zackary Angeline
Whether for leisure, exercise, or commuting to work, cycling is an excellent outdoor activity that can get you fit while reducing your carbon footprint. Riding a bike is more popular than ever, considering the number of people in the U.S. age 6 and older who bike regularly increased by more than 13 million from 2006 to 2020. That’s excellent news since it means more people are taking steps to improve their health and be kinder to the planet.
However, being a responsible cyclist means taking proper care of your bike. Maintaining and repairing your two-wheeler will help keep you and others safe on the road (or trail). If you can do these five basic bike repairs safely and efficiently, you’ll extend the life of your bike and enjoy it for years to come.
What You’ll Need
Like vehicles, routine bike maintenance is essential for performance and safety while riding. In addition, a bike that’s well cared for will save you money and enhance your riding experience. Instead of waiting for something to break mid-ride and taking it to an expensive repair shop, regular maintenance can help prevent injury and save on costly repairs down the road.
Essential Tools
The following tools are widely available, easy to use, and should be included in every cyclist’s bike repair toolkit:
- Allen wrench set (ranging in size from 2 to 12 millimeters)
- Chain brush
- Chain lube and cleaner
- Clean rags
- Latex gloves (for cleaning)
- Open-end wrenches (ranging in size from 6 to 17 millimeters)
- Spare tubes
- Tire levers
- Tire pump with gauge
- Torque wrench
- Tube patch kit
How to Fix a Flat Bike Tire
There’s nothing more deflating for a cyclist than a flat tire. Knowing how to repair a flat is a valuable skill that can save you time and money. Plus, it’s relatively easy and doesn’t require many tools or experience.
According to the Mountain Equipment Company (MEC), the first step is to remove the wheel with the flat tire. Remember to disconnect the brake cable from the brake arms if required. However, most modern-day bikes also have a quick release on the brake lever or caliper to facilitate removing the wheels without having to disconnect the brake cable.
If it’s your rear tire, shift your chain to the smallest sprocket. Then, loosen the quick release to free the tire. If your wheel is attached with nuts, you may need to use a crescent wrench.
Your next step is to remove the tire’s inner tube. To do this, open the air valve and let out all the air inside the inner tube. Then, take the tire bead off the rim by inserting a tire lever between the tire bead and rim edge at least half an inch away from the air valve. Next, pull the inner tube out from inside the tire—exercise caution when pulling the valve through the rim to prevent damage.
Next up, you can replace the damaged inner tube with a new inner tube or you can locate the leak and patch the hole. To do so, simply inflate the damaged tube using a bike pump, then hold your hand or face near the tube while moving it to determine where the air is escaping. If this doesn’t work, try submerging the tube in water and see where water leaks out.
Once you’ve confirmed where the hole is, it’s time for patching. First, make sure the tube is dry and completely deflated. Then, use a patch kit and follow the step-by-step instructions for patching the tube. Once repaired and the glue is dry, reinsert the fixed tube into the tire. Next, inflate the tire to the recommended tire pressure, tighten the valve nut, and replace the valve cap.
Reinstall the wheel onto the bike frame. Do this by pulling the derailleur down and checking that the chain wraps around the cassette. Next, ensure the disc brake rotor is aligned with the space between the brake pads and check that the axle is in the dropouts. Lastly, check that your brakes work before riding.
How to Reattach a Dropped Chain
Every cyclist has experienced a dropped bike chain at some point. Knowing how to reattach a dropped chain is a necessary skill that you should have in your bike repair knowledge bank.
If your chain slips while riding, start by downshifting into your bike’s lowest gear, which ensures the chain will be on the largest chain ring. Keep pedaling to see if this realigns the chain. If downshifting and pedaling fails to work, get off your bike to have a closer look.
While holding your bike seat with one hand, lift your back tire while spinning the pedals with your opposite hand. Push the rear derailleur forward to release chain tension. Then, lift the chain and place it back on the chain ring.
Keep spinning the pedals by hand while elevating the back tire to realign the chain. Bike chains are greasy, so expect to get dirty. Wearing a pair of latex gloves will help keep your hands clean.
You can prevent chain slips by checking the number of teeth exposed under the chain ring. Wiping off the chain after every use or having a chain brush on hand also are easy ways to care for the chain. Read your owner’s manual to understand how to maintain your bike chain as each brand is unique.
How to Replace Brake Pads
Similar to cars, your bike’s brake pads don’t last forever. Unfortunately, they’re a critical component of your bike in terms of functionality and safety. The good news is that brake pads are small and lightweight, so you can easily carry them in your repair kit when riding.
You can tell if your brake pads need replacing by going for a quick spin and pumping your brakes. If your brakes feel soft and you’re not stopping fast enough, your pads likely need changing.
Using a mini-screwdriver, unscrew the brake pads from the shoe and replace them with the new pads. Ensure the pads are aligned with the tire rim, matching the orientation of the old pads. Make sure the pads are pointing in the correct direction as they have distinct sides (front and back) and often include arrows on which direction the tire should pass.
Once you’ve installed the new pads, reduce the brake cable tension. An important note is that not all brake pads work with every tire. Avoid wasting time and money on buying the wrong pads by carefully reading your bike’s specifications before purchasing new pads.
How to Loosen a Stuck Seat
Your bike seat may become stuck and unable to adjust for several reasons. For example, the seat post may become seized mechanically due to it being the incorrect size and forced into the slot, or the issue may be chemical and caused by corrosion.
To resolve this issue, remove the seat post binder bolt and squirt penetrating oil (e.g., WD-40) around the seat post. Allow the bike to sit overnight.
The following day, twist the seat saddle to see if the oil loosened the seat. If this doesn’t do the trick, repeat the same procedure except with ammonia or Coca-Cola instead of penetrating oil, as these help dissolve corrosion. Nine times out of ten, this will get your seat unstuck.
To prevent future sticky situations, periodically remove your seat post and flip your bike upside down to allow water and moisture that’s accumulated over time to drain out of the seat tube. Occasionally grease your seat post and spray penetrating oil inside the seat tube. This will allow for easy removal of your seat post in the future and prevent corrosion.
How to Tighten Loose Bolts
It’s common for bikes to begin creaking and parts to loosen over time, which is why it’s essential to know how to tighten loose bolts correctly—and more importantly, how to tighten them to the proper tightness. Loose nuts and bolts can cause parts to fall off or even result in a crash.
So how can you tell when it’s time to tighten your bolts? And how can you ensure they are tightened properly without over tightening? The answer is using a torque wrench. Torque is a rotational force commonly measured in Newton meters (Nm).
Each bike is unique, and every bolt is designed for a specific tension range (also called “torque specification”). Refer to your owner’s manual or check online for the recommended torque range of each bolt on your bike.
Using a torque wrench will ensure you’ve tightened each fastener to the correct torque range. Torque wrenches are tools used to measure a fastener’s resistance to rotation. They’re the best way to adequately tighten your bike’s nuts and bolts.
Before starting, make sure the torque wrench is set to zero. Then, tighten bolts until they are within the recommended torque range. A good rule of thumb is to check the tightness of your bike’s fasteners (bolts, nuts, screws) once a month to ensure parts are tight and everything is connected correctly.
A Word From Verywell
Whether you ride on city streets or mountain trails, knowing these basic bike repairs will help you get the most out of your bike while keeping yourself and others safe. That said, it is just as important to know when to seek the help of a qualified bike mechanic is essential.
If you’re unsure how to do a particular bike repair or have any questions regarding bike maintenance, don’t hesitate to contact a professional mechanic. They can assist in getting you safely riding again as soon as possible.
Frequently Asked Questions
- How often should I lube my bike chain?
The frequency at which you lube your bike chain will vary depending on how often you cycle and the conditions you ride in. For example, wet winter conditions with salted roads or muddy trails require much more frequent lubrication than warm, dry weather on smooth paved roads. At a minimum, most bike experts recommend that you lube your chain once a month or every 150 to 200 miles. If you ride daily and in wet weather conditions, lube your chain every other week.
Learn More: What Is Cycling Cadence? - What is a bike tune-up?
Whether you’re dusting off an old bike or looking to maintain your new two-wheeler, tune-ups are vital for extending the life of your bike. Scheduling a tune-up every spring with a professional bike mechanic will help ensure your bike functions smoothly and safely. According to Bicycle Universe, a typical bike tune-up consists of the following:
- Clean dirt, oil, and grease off the bicycle.
- Check gears and derailleurs for damage and alignment.
- Check drive chain for stretching/kinks.
- Inspect brakes for wear and grip.
- Check tires for wear, cracks, and bulging.
- Check and adjust all cable tension.
- Check wheel and frame alignments.
- Check and tighten wheel spokes.
- Check headstock and seat pole for tightness/movement.
- Tighten all nuts, bolts, and screws to ensure stability and safety while riding.
- Apply oil and grease to moving parts where required.
Learn More: Outdoor Workout Safety Tips - How do I know if I need a new bike chain?
The easiest way to determine if you need a new bike chain is by doing a pull test. First, pull your bike chain at the front of the chainring where it’s wrapped around the crankset. If the chain lifts off at the top or bottom where it sits on the teeth of the chainring, this means the chain has lengthened and no longer sits in the chainring teeth properly. Lifting is a telltale sign that the chain is beginning to wear and will need replacement soon.
Statista. Number of participants in bicycling in the United States from 2006 to 2020.
The Clymb. Basic bike repairs every rider should know.
Roll Bicycle Company. Bicycle maintenance: 7 essential tips, for every rider.
Outside. Technical FAQ: Stuck seatpost remedies.
Liv-Cycling. How to use a torque wrench.
Bicycle Universe. What does a bicycle tune-up consist of?
Cycling Tips. How to check for chain wear: The easy way, the best way, and why.
:max_bytes(150000):strip_icc()/AdamMeyercolour-6957287fb2a6496497af1d0533f89384.jpg)
By Adam Meyer
Adam is a health writer, certified holistic nutritionist, and plant-based athlete.
:max_bytes(150000):strip_icc()/vwt-bicycles-under-500-test-vilano-shadow-3-0-road-kyle-dornath-6-1-a32458708e524db08e978448f5fadb6d.jpeg)
:max_bytes(150000):strip_icc()/Bike-Safety-Recirc-6bd3635674b0436584698981e92f88be.png)
:max_bytes(150000):strip_icc()/the-best-air-bikes-tout-8ffa4727100944a5998d711b85ee4035.jpg)
:max_bytes(150000):strip_icc()/12-best-folding-exercise-bikes-of-2023-tout-8790d2d4170044dd8afd6b1ba5714d44.jpg)
:max_bytes(150000):strip_icc()/VW-Fit-v1-The-10-Best-Recumbent-Exercise-Bikes-of-2021-4687331-f2ec1e4cbd294282b9bf2ddd395e04d6.jpg)
:max_bytes(150000):strip_icc()/best-bike-seat-6259799-VerywellFit-DD_2-ee872011ddb844119ac64d0656c5c22f.png)
:max_bytes(150000):strip_icc()/_hero_4158195-4-cad048278426437db01151dc03bfc858.jpg)
:max_bytes(150000):strip_icc()/VW-Fit-v1-The-7-Best-Bikes-for-Women-of-2021-4176624-30d9eba0498e4f5c8dc93c99dc1a3471.jpg)
:max_bytes(150000):strip_icc()/Bike-Options-Primary-d823a480175b4c2a8432f18f37761886.png)
:max_bytes(150000):strip_icc()/GettyImages-598462147-5705d3d95f9b581408cac331.jpg)
:max_bytes(150000):strip_icc()/VWFit-Cycling-Journey-How-to-Choose-the-Best-Cycling-Shoes-edit-1-51084073b11c4be9a5efd0829584c2d8.jpg)
:max_bytes(150000):strip_icc()/_hero_SQ_Keiser-M3i-Indoor-Bike-1-4bd58d7953d441b5a380662de1b9a4bd.jpg)
:max_bytes(150000):strip_icc()/1-fefe2cc07fed41a8ab58c97718657546.jpg)
:max_bytes(150000):strip_icc()/verywell-fit-best-bike-trainers-of-2022-tout-5d68fc46b9fb4af19f6475bed6321a37.jpg)
:max_bytes(150000):strip_icc()/GettyImages-1145944459-45ba519e865d4f928ff709f4fb738c5c.jpg)